![]()
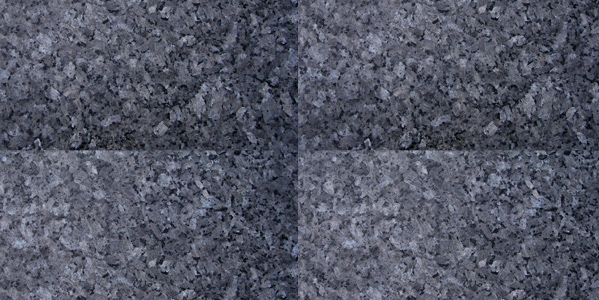
Duplicating textures is sometimes complicated. Non-uniform textures show their duplication with evidence. This often happens when we use picture taken from our camera or downloading non-tilable Texture (mostly free).

The problem is not the whole texture, but specifically its luminosity. There’s a simple technique with Photoshop to get a uniform luminosity.
![]()
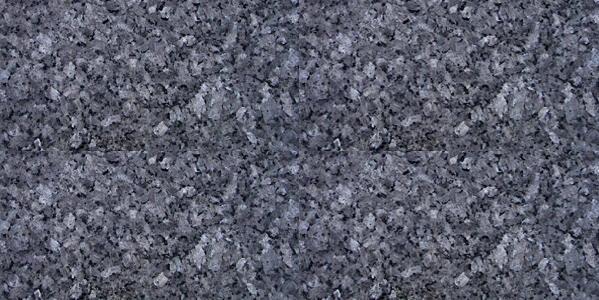
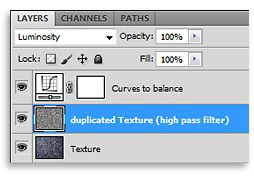
Use a photoshop filter called High Pass Filter in Lumonosity blend mode.
Result:

Check the video below to see the process in detail, and after carry out the exercise :
![]()
Resume – The 3 steps to balance luminosity:
- Duplicate the layer
- Apply it Filters> Other > High Pass Filter (choose the right vaule in order to preserve details)
- Assign it  “Luminosity”
( If needed, add a Curves to balance loss of contrast)
Here a simple workflow to understand how to arrange the levels on Photoshop:

DOWNLOAD THIS PACK and repeat the exercise.
For any doubt, check “FINAL” version.
 / Also Learn Corona Renderer


Great Tutorial! thank you for saving me so much time!
Haha, another great trick, I’m glad I found this website. Thanks!
very nice tutorial
Thank you guys 😉
thanks alot its very helpful.
MANY THANKS!
nice tutorial sir
thanks a lot . it s great trick ! so usefull!
thanks Ciro
Muiiiiiiiiiiiiiiito Bom.Você caiu do Céu. me foi muito útil.
Um grande abraço a VC e atodos do Blog.
Aguardo mais materias.
Thanks Sir, Realistic And Nice Tutorial
Nice, as and the whole idea of side, auxiliary material never not for many.:)
I greet.
thanks..very helpfull..!
Thanks!
This was simple and very useful. Keep on posting!
thanks sir, very useful tutorials;)
thanks for this tutorial……..keep it on.
Great stuff Ciro, i saw many info about the Offset filter but this issue/solution is new for me, thanks!!
Thanks Ciro. If possible, it would be great if you can include some very basic-beginner level lighting tutorials 🙂 It’s difficult to find such tutorials.
This will not work on rock textures….
Prove me wrong please 😐
there is always the offset filter in photoshop to “cure” the seams
this is a good trick for correcting the overall lighting of a texture, for larger details like tile gaps and rock creases, use the offset filter to stamp the seams.
Thanks! nice and easy tutorial, it’s a very practical way to set some old textures to work better.
Cheers!
Very nice tutorial
I was looking for it
Thanks
Thx for this, super stuff.
Dude. That is not how to make a tileable texture. The correct way is to use the offset filter and then clone stamp out the middle seams.
Hi ANDONI,
as many users you didn’t read the introduction:
« ..what if we have a texture and the brightness is not uniform? »
If the problem is non-uniform brightness this is a good the solution.
What you are saying is another solution, for other problem… and also your solution does not work fine in certain situations.
Regards
I cant’s see your posted videos it’s get stuck in between only.
Hi Sameer,
I think you have some problem with your browser or flash.
Try with another one 😉
Thanks a lot 🙂
thank you very very much..
Hello
Thank you for the exercises that you’re offering.
I love to show you my work and let me tell my problems.
And if you watch a part of our work is done problems to tell us what good work I think we’re apart from your friend
We’re waiting for more exercises
Hi Ciro! This technique is stunning, great and necessary for me. And it is impossibly simple. And it is fast too. I like your blog. Thank you for your lessons.
Hi Ciro, Excellent, I have used this technique today perfect result….
thanks
Good tutorial, as usual,
Still have a question though, Where is the ” Assign luminosity ” function?
I use Photoshop 7, so I am not sure if this is available…
Thanks,
Excelente tutorial, muy útil la verdad estaba buscando algo como esto. Gracias
thank u so much….
VERYY GOOD
i’m from iran you very help me thanks soo much >:D<
hello sir i am from India thank’s for this texture details is very important
PS and theirs interesting filters! thanks so much Ciro Saninno.
i gona to use to my works
saludos desde PERU!
Cool! Thanks!
Очень нужный и полезный урок!!! Ciro,ÑпаÑибо Вам!!!..
such a fabulous tip
so nice tutorial
super trick, thank you very much!:)
very wonderful
Bravoooooooo, Bellisimo,
Merci beacoup, Gracious 🙂