– Click LIKEÂ above, if you like this post 😉 –
Recently I posted on my Facebook Page this image I got playing with the material editor:
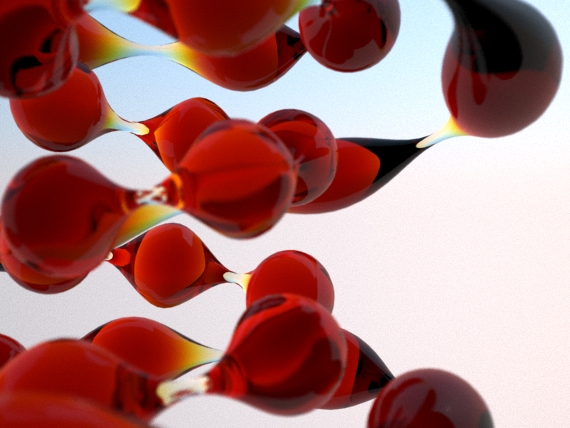
Guys, because you want to know more about it.. here a couple of tips 😉
The scene is just a Torus Knot object with V-Ray Sun + Sky. Nothing more.
Here a screenshot to show you how I set this material:
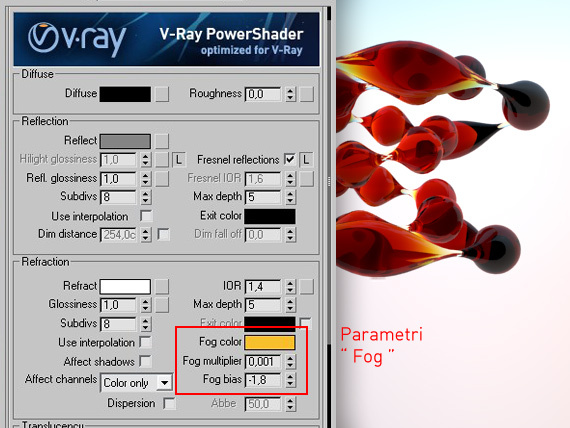
I used the classic V-Ray glass simulation, adding a touch of  “negative fog bias” .
« Ohh Ciro, wow… it’s amazing! But…what does it mean “Negative fog bias” ?! » :-[
Well, a little introduction about general Fog Color settings is needed. Fog color is used to simulate colorful refractions, the default value is white (glass = neutral). But if we give a color, the glass will result in color: its color will be in relation to the thickness of the object:
- Thin objects will have light and soft colors
- Thick objects will have intense and dark colors
Just like the real world.
Here is the effect just for “Fog Color” option:
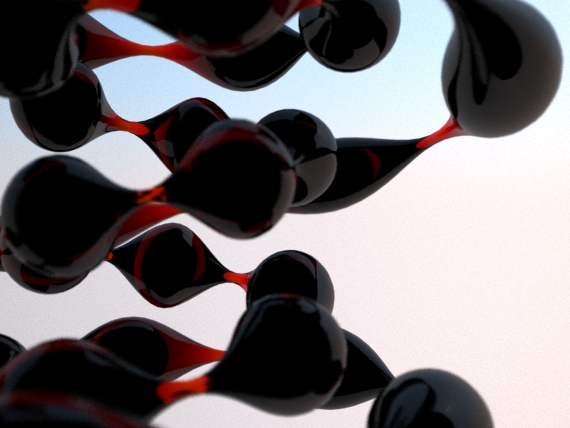
As you can see, the color intensity changes for thick and thin areas.
Fog Bias! This parameter allows you to adjust the contrast for transition thin-thik areas. If you use negative values you can emphasize the effect producing:
- darker colors for THICK areas
- clearer colors for THIN areas
For this reason negative fog bias must be accompanied by a drammatic reduction of the “Fog multiplier” (0.001) to avoid too dark areas.
Here the parameters I used in the first image:
Fog color: 236 – 135 – 5 (rgb) / red color
Fog multiplier: 0,001 / brightens the refraction
Fog Bias: -1.8 / increase contrast thick-thin
Result:

Choose a color and balance Multipier Fog /Â Fog Bias. The reddish color is perfect for “warm glass” , but also with other colors, fun things happen:
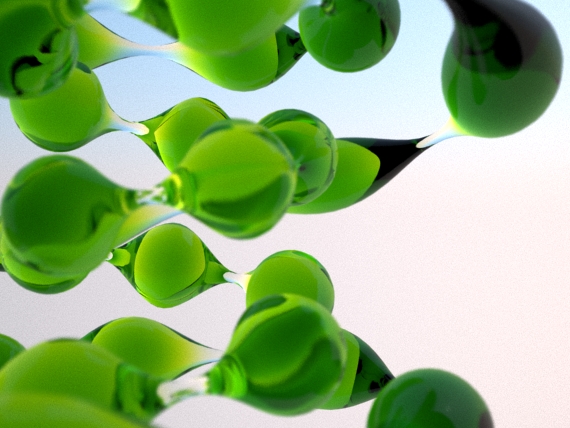
( Fog Color = 210 – 238 – 54 / RGB)
It’s just a game, but useful to learn more.
Enjoy it 😉
(*) THANK YOU Pixelab.be for inspiring me.

[private Premium|Premium1|Premium-1year]
VIDEO :
What did we learn in this video?
VIDEO SUMMARY:
- Create the object and add V-Ray Sun / Sky
- Enable Global illumination for “tests”
- Create a standard Glass material
- Add fog color
- Play with Fog Multiplier and Fog bias
- Add Dof effect simply flagging “dof”
EXERCISEÂ :
Download the file and reproduce the image of this post.
For any doubts open the “FINAL” file and check the options.
Enjoy it!
[/private]
 / Also Learn Corona Renderer


deep deep knowledge thanks for sharing 😉
Nice. Thank you. Thick objects will have intense (intese) and dark colors.
Thanks Valentin 🙂
Ciro hello!
I have been trying to recreate your tutorial but I always fail! 🙁
I use the material just as you have shown, a vray camera with 100 in shutter speed (I experimented with the shutter but I still did not get a result), a vray sun and sky without changing any parameters, but I can not get this result.
I want to ask you about the object you created. Ok, I see you had used a torus knot, but how did you get this thick and thin effect in your object.
Help me please! 🙂
Don’t worry about object and the exposure… just create whatever object you want with thick and think parts. Set the material as indicated and everything will be fine.
Nice effect. Thanks for sharing
nice render scene
thanks ciro nice nice nice
Thanks for sharing 😀
nice info. 🙂
it is so cute.thank you
Great tip! Nice use of torus knots too.
this whole post is just a blatant rip off from this:
http://www.pixelab.be/blog/2008/09/14/fog-bias-parameter-test-in-vray-material/
ciro, you should be ashamed
Dear Sir,
my contents are created for getting 5SRW official certification. The link you’re mentioning inspired me to do the same, but there’s no images copied. Otherwise our students can 1) download the model / 2) watch the video / 3) get a certification. This is 1 among dozen of exercises for 5srw certification. 3ds max invented “torus knot” and V-Ray invented “fog bias”, so it’s public domain using those 2 elements. Best regards.