Here we are for another post about 5-Step Render Workflow® :
our complete method to manage render process in 5 easy steps.
The previous step was the crucial Light Balance, now it’s time to add colour: how to create materials quickly.
5SR-WORKFLOW: Materials / Step 3
In this video we will apply the general rules from the Mini course – Lesson 8. Also I will show you how to enhance reflections easily with a “soft” V-Ray Light.
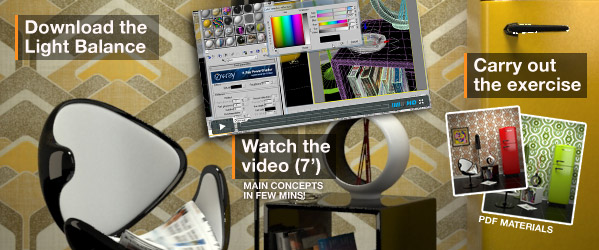
VIDEO
This step can be split in two parts:
- assign colors (diffuse + textures) and check if lighting is still fine
- add reflections and refractions
Your time is money!
To make a shorter video, every “book model” is already mapped (it’s just a simple texture) and below you also find a Pdf guide to download, with all material settings.
[private Premium|Premium-1year|5trainings]
MATERIALS PDF: Download the V-Ray Material Guide > right click > “save link as”
CONCEPTS
- Add only main colors/textures
- Check the exposuse: if exposure is fine, jump to add reflections/refractions
- If the image is under or over exposed, just modify  “shutter speed” to find the right exposure
- Add reflections/refractions
- Use “soft” V-Ray lights to enhance reflections (looking for the result, turn off the others)
- Don’t worry for grainy now. We will talk about in step 4: “final render”.
FIXÂ OVEREXPOSURE
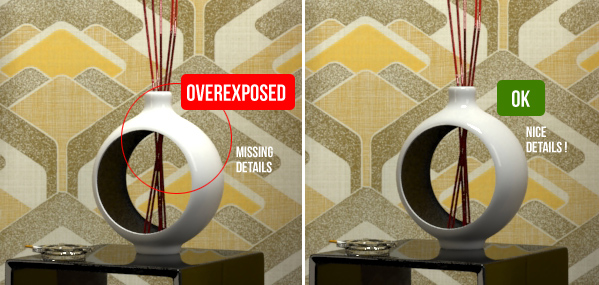
Before completing this step you will need to check that everything is perfect. We are still working in low definition, but everything must be ok from here. If a single object is overexposed (usually this  happend with bright objects) you make it just a little bit gray. Usually this trick works fine.
EXERCISE
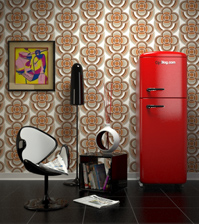
DOWNLOAD 70s  – STEP3 — START: light balance is ok: now create V-Ray Materials.
Don’t modify the lights anymore! Since the light balance is ok, just be concentrated on materials.
(I already mapped the books to give youa faster exercise)
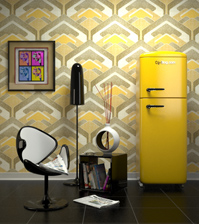
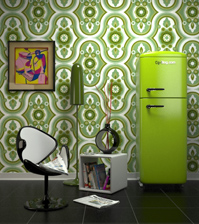
Try to imitate the images below – click to magnify
Solutions:
Try to achieve the same results by yourself  and then DOWNLOAD 70s – STEP3 – SOLUTIONS to verify your work.
[/private]
 / Also Learn Corona Renderer

wow… it’s amazing!!! I never created a render such this in this time. Great great post.
I really enjoyed this post. Muchas gracias Ciro! 🙂
(I think you confused the link for exercise/download!!)
Hey Paulo… fixed right now!
Gracias por tu comentario ^^
Hi Ciro, do not know if it is a mistake or something minor but in the scene that you work, there are books, ashtray, newspaper etc … and in the scene that you give the link to download is not complete, it was just for you to know .
A greeting and thanks.
Yes Kepa!!!
Thank you for your comment… it’s ok now, I just uploded the correct files.
Sorry, I’m running my live training (in italy) these days and I had an oversight 😉
I’m learning post by post, I know something but every week I’m lerning something different. I also like I’m sure of your information. Thanks
Simply and effective. Thank you!
Thank you Mohammad!
Hi Ciro, I read carefully this post and I really liked it, congratulations, you’re so clear explaining. I have a question: do you think that if I complete the light balance, after adding materials the lighting will be the same or it will suffer come change?
(sorry for my english!!!!!) y gracias!
Hi Mariana (mejor hola… no? 🙂
yes you already answered your question: create a “perfect light balance” and after adding material never changes the lighting. You could have darker or brighter.. in this case just modify “shutter speed”, but the light balance will be the same. Spend many time to create the best balance you can and the rest of the work will be easier 🙂
Hi Ciro!
Very interesting tutorial, thanks, but I would like to learn more how to create complex materials 😉 .
Hi KostYan,
thank you… I’m planning it 😉
Cool, waiting for it eagerly!
Dear Ciro does the light balance applies the same for interior with a few nos of downlights only and some cove lights . when i place my vray lights to be my main lights i am having problem of not seeing the full scene with a clean ceiling with lights .
By the way , nice tutorial .
Hi Lim,
are you talking about this scene or your personal (different) scene?
I am talking about my personal scene.
It’s just an exposure problem. We will talk later 😉
ciro good help to new artist very thanks.
HI Ciro
Just downloaded another .zip file, and again it says it is corrupt.
Starting to think, does anything work on this site…
Really excited about what I will learn, but Can’t get to the files to view them, as the zips are corrupt.
zip file this time is 70scene—STEP3—SOLUTIONS.zip
Hi Chris,
is “70scene—STEP3—SOLUTIONS.zip” the only problem, or also other files?
I tried to download the file it is OK. Since you are the first user with this issue I’m thiking this is happening at your side. Have you tried with different browsers?
me 2 , i have the same problem with the same file
Hi Mahmoud, did you tried with different browsers?
Hi Ciro
In your Material PDF, what is the Black Rubber used for in the scene?
Also, what material did you use for the Canna? I just placed some semi-precious gems which looked quite nice…just curious.
Thanks
Hi Alan,
I used the black rubber on the handle of the fridge. Nice your idea 😉
Hi Ciro, amazing tutorial and information learning a lot!!
Thanks