Let’s start STEP 5 of 5SR-Workflow® : Post Production.
Here it is what we’ve done so far: Basic 3d Model(1) >Â Light Balance(2) >Â Materials(3) >Â Dof and Final(4)
Today I’ll show you a really simple and professional technique to get a vintage effect.
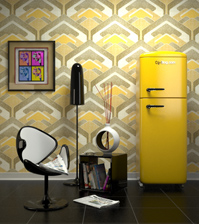
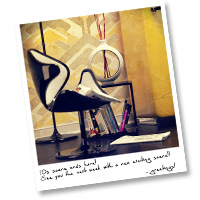
After this lesson you’ll be able to produce this kind of images in Polaroid Style:
STEP 5: Post Production
There are many ways to get this result, but in my experience the best and professional way to reach this kind of look is resumed in two fundamental steps. Follow the Video and the vintage look is guaranteed.
[private Premium|Premium-1year|5trainings]
- Add a dark blue layer (rgb = 0,0,40) in Exclusive fusion method
- Add an old-style-jpg in Multiply fusion method
Ok! Let’s start to create this look step by step. Watch the video:
CONCEPTS: Typical aspects of polaroid look
- Polaroid format is a square
- Use blue layer/exclusive to give a dominant color in darkers
- Contrast and vignette
- Add an old paper effect/multiply
RED & GREEN VARIATIONS:
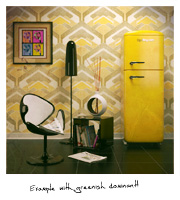
Polaroid effect can also have “reddish” or “greenish” dominants. It’s really easy to replicate this variation with a darker red, or a darker green in exclusive fusion method.
- dark Red layer (rgb=20,0,0)
- dark Green layer (rgb=0,20,0)
For RED and GREEN I prefer colors darker than Blue. Below you will find same examples:
 * EXERCISE *
Start now downloading Renders + Old Paper and create Vintage Effect.
Remember you can use this simple technique with every light balance and every style you created in the previous steps, to infinite combinations.
You are also authorized to use these images for your personal portfolio.
( Solution: Dowloload the FINAL PSDÂ )
[/private]
 / Also Learn Corona Renderer





Hey Ciro, I really aunderstand the value of your training. I’m learning a method.. finally… it’s the first time I feel i’m learning from the web! Thank you again for your genius!
Thank you for another great lesson… I started an yearly subscription, thank you thank you! 🙂
Wonderfuuuuuuul thank you… i’ll try the exercise wit one of my renders.
Thanks bro
Hello mr Ciro,
finally a lesson about post production, I was waitin for that… but I have a question for you. Can I use curves(blue) to get the same effect? Thank you again
Hi Jennifer,
yes of course you can but curves also changes luminosity/saturation at the same time. The professional was is keeping separated the action: 1 action for blue dominant, 1 action to bright. This kind of approach was inventaed by Dan Margulis (probably the best photoshop guru in the world) 15 year ago and is used still today.
BEAUTIFUUUUUUUUUUUUUUUUUULLLL!!! *__*
I always loved this style!!!!!!!!!!!!!!
great! Cant wait for the next 5step tutorial!! 😀
very nice…
Greate one! Thanks a lot.
btw. cool backgroundsong :o)
goooooood job best rendering
dear sir i created paw and i want to create it’s nail crow like with help of spline extrusion but facing problem could you help me..
Super excellent!! Finally Post-production and explained by the easiest way!!
Thanks a lot Ciro!!
Thanks my teacher
veryyyyyyy gooood.
how to join to your site…..???