In this lesson we will talk about:
Step 2 of the 5-Step Render Workflow® > Light Balance.
Watch the video preview below, then start the lesson:
Contents:
- HD Video 10mins – LIGHTING PROCESS
- Download the full 3D model /Â for 3ds max 2010 or superior
- Learn the photographic light balance in V-Ray
- Carry out the exercise
V-Ray covered Topics:
- Light Hierarchy
- Combine V-Ray Sun + V-Ray Light + Spot light
- Use V-Ray Real Time
- Modify V-Ray Sun shadows
- Create a chromatic contrast (warm/cold)
Time to complete: 15-20 mins
[private Premium|Premium-1year|5trainings]
Let’s start the Light Balance
The main problem is that in this scene we just have 1 window for the sun and sky light, but the room is too big and this window alone couldn’t light up the whole scene.
The light decays quickly in interiors, that means in 2-3 meters the scene will get dark.
To compensate that problem we need to improve natural light with other lights…
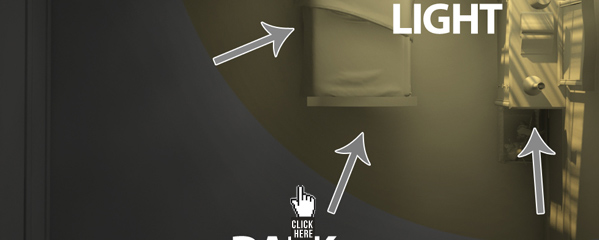
Representation of light decay:
As showed in the preview, the light sources we will use to create our light balance will be:
- V-Ray Sun + V-Ray Sky for natural light
- V-Ray light (cold bank light) to simulate natural light coming on the left
- 2 standard spot lights to light and enhance furniture in the darkness
Mixing all these sources is not easy,
for that we need to respect the main rule for good photography >Â create a light hierarchy:
- Sun/sky: primary light
- V-Ray light: secondary light (to illuminate the shadows)
- Â Spot lights: to enhance furniture (strong but localized lights)
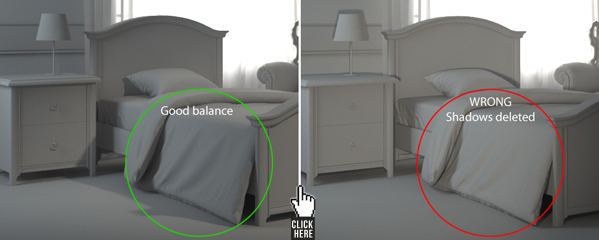
In particular, when using these spot lights it is important to pay attention to the shadow – never cross the shadows generated by other light! Use these lights to shape the furniture in darkness, but don’t delete or fade the other shadows.
Think about: the whole scene is built of shadows. The shadows have the power to enhance the object in the scene, which means that you can’t put a light without thinking how your light will affect the whole scene and other shadows. Use localized spot lights, use a limited “light cone” and find the right angle which allows you to get the best shadows for your object.
LIGHT BALANCE CONCEPT.
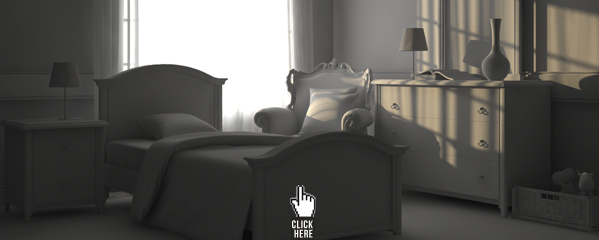
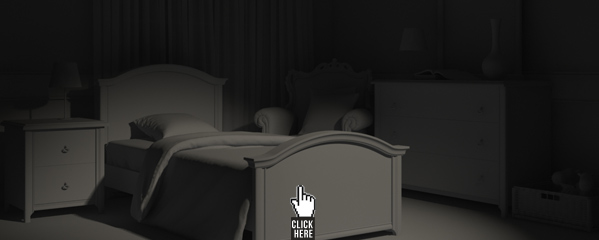
FIRST LIGHT: Just create a V-Ray Sun and accept the default V-Ray Sky:
To get this exposure use V-Ray Physical camera:
- f = 8 (default)
- Shutter speed = 20
- ISO = 100 (default)
Sun + Sky is the strongest light in the scene and this could be the first problem, we can get a bad overexposure on the furniture on the right.
A very common tip for (real) photographers to limit the incredible strongess of the sun is using a curtain. The curtain limits the sun and also cover the exteriors which in this case is completely overexposed, not beautiful to see in a picture.
Unfortunately the overexposure on the curtain is impossible to avoid, but don’t worry about it because we will solve this problem in post production with a smart technique called “sandwiching†(step5)
( For the curtain we created a VRray2Sided Material. All the scene has a generic material applied except for the curtain. Don’t think about this special material, for now just focus only on the light balance, you’ll find the explaination of curtain material in the next lesson about materials (step 3). Keep focused on light balance. )
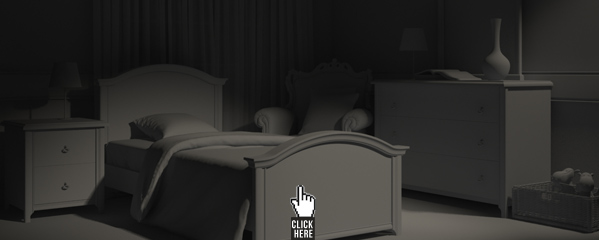
SECONDARY LIGHT -Â Add a V-Ray light on the left:
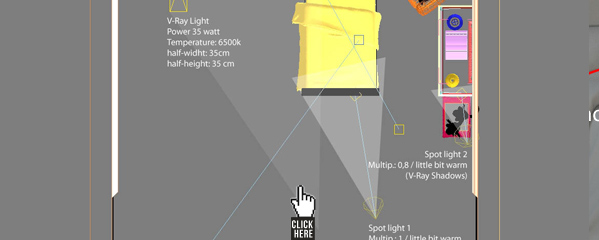
- Power: 35 watts
- Temperature: 6500k
- Â half-width: 35cm / half-height: 35 cm
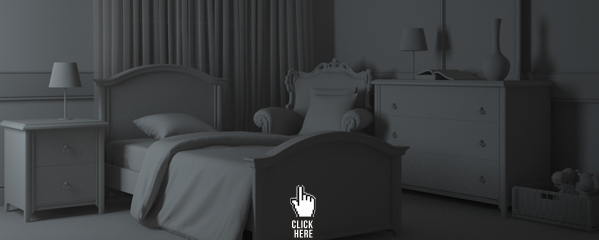
This is how this single V-Ray light affects the scene:Â note the nice shadows on the blanket!
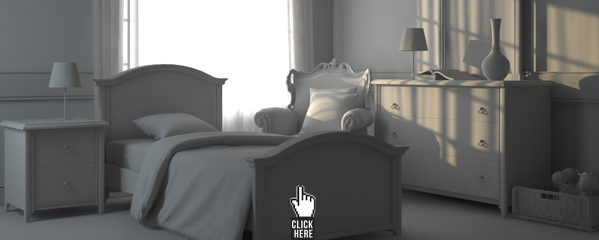
Now mix V-Ray light and Sun: they fix fine togheter (but part of the the bed is in the dark)
ENHANCE LIGHTS: the spot lights
Standard Spot Lights are strong lights (multiplier around 1) but the main aspect is that they have a little “light cone”, they are local lights. We will be careful not to delete the beautiful shadows we got with Sun+Sky+VRayLight. Remember : Add shadows but don’t delete and don’t duplicate them.
Add a spot light from the top toward the bed: showing only SPOT 1 – ( SETTINGS FOR THIS LIGHT )
Add a spot light from the top toward the furniture: showing only SPOT 2
And the 2 spots together:
The professional way to build a professional light balance is work 1 light at a time.
In this way you will have the total control of every light, you must know how every light is affecting the scene.
Practical application with V-Ray
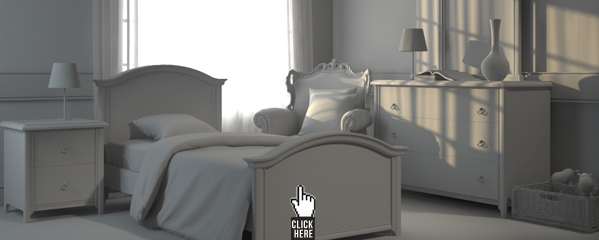
ALL LIGHTS ON – Final result:
Layout – (top view) :
Light balance is ok. In the next step, when we’ll assign the V-Ray Materials this balance will be constant. Exposure can change, balancing can’t. I can assure you if you complete perfectly this step, if your lights and shadows create a really “tridimensional†image, the final image success is guaranteed..
« Light balance is the most important step in the process, it is the foundations of our render. »
Common mistake
We only have few rules to respect:
Create a hierarchy – Don’t cross the lights – Don’t delete/duplicate the shadows.
Therefore I want to give you an example of this mistake: I run the spot1 to lights up the shadows of the VRayLight, in other words I’m deleting the shadows from VRayLight. This is a really big mistake and the image will result flat and strange.
Initially, all these concepts are not so easy to apply but when your mind will jump on this level of thinking you’ll see your renders become extraordinary.
The only thing I can suggest you is just start thinking with this photographic approach.
Ciro Sannino
Exercise
Download this scene, use the TEST preset or whatever setting you want (this is just my suggestion to work quickly) and apply these concepts to create the same light balance.
After, when you’ll be more confident try to create your own light balance: just remember the main rules: create a hierarchy, don’t cross the lights, don’t delete the shadows.
FILES TO DOWNLOAD
- Exercise – Delicate Room – no lights | OBJ Version (minimum 3ds max 2010)
- Solution – Delicate Room – COMPLETE Â (minimum 3ds max 2010)
*
*
NOTE1: If you have a good graphic card 8like (at least GTX 570 – 450cudas) use V-Ray Real Time with GPU for super fast previews. Of course you can also use Real Time with CPU.
NOTE2: V-Ray Camera has a clipping plane enabled. (during this week I’ll add more details about in the knowledge base, for now stay focused on the light balance).
[/private]
 / Also Learn Corona Renderer


this lesson is A-M-A-Z-I-N-G!!!!!!!!! great job
wonderful lesson Ciro, thank you very much… I think i was in a photography stage 🙂
Great great great!!!
Excellet material to study and understand in deep the light balance.
oh-ohhhhhhhhh!!!!! *___*
Thank you sir, I understand the lighting!
So I can use spotlight with vray light?
Thanks in advance
Graciaaaas Ciro, this post is incredible… you explain the concepts really easy and I can learn everything like drinking a glass of water! (asì se dice en mi pais!)
JUST PERFECT.
Thank you Ciro for this lesson! Please can you tell me why are you using a vraylight on the left. Thank you 🙂
Can’t wait to try this out 🙂
Hi
How can i render with GPU?
Do you have any instruction for this?
Hi Hamed,
add V-Ray RT in “activeshade”, then go to:
RENDER SETUP > ACTIVESHADE > Engine Type = OpenCL
Check this image:
https://www.cg-blog.com/wp-content/uploads/2012/04/ScreenShot1019.jpg
😉
Ciro,
In max 2012, the new Display driver, Nitrous, is a very fast way to preview too. It relies in video card as VRay RT, but is faster than max 2011 display drivers.
Hi Marco,
I’m agree about Nitrous, but V-Ray RT is different… it’s a perfect preview of your final render. This can incredibly speed up your workflow. Thank you for your suggestion 😉
i am using vray 1.5.. i am not getting activeshade…
Yes Sadanand. Before RT was another external plugin you need to buy. only from V-Ray 2.0 RT is included.
Hi Ciro!
The camera in this exercise scene has another option… Maxwell Parameters
Where did you get this?
When I add a new camera, it don’t appears.
Hugs
Ola Ricardo, you don’t need to work whit this option. I’ll update the file deleting this rollout. The only thing you need is a default V-Ray Physical Camera (with shutter speed = 20)
Hi….
I know that I don’t need it for this case.
but I’m curious… because I’ve seen this option before
and I have no idea where it comes from.
hugs
Hi
it is very very nice scene amazing how can i download this tutorial
how should i pay ?
Hi Hamid,
you can check our offer here > https://www.cg-blog.com/index.php/cgb-premium
hi
why do not do a tutorial on architecture outside?
Hi M’Barek,
lighting in interiors is much more complicated. Exteriors are not the best to learn lighting.
Tnx 🙂
hi
I agree with you, but we like a tutorial of villa with trees,
pool …
cordially
Thanks Ciro
Hmm and i thought we will use Sun and Sky System for interrior too, but now i will try it and I hope i will understand it 🙂 Thx for the share
Hi Stefan,
it’s reeeeally easy concept: we have 4 lights and we just need to find the right balance between them. I just uploaded a new video.. if you understand the concept, using V-Ray will be super easy! Good luck… be focused on the concepts!!! Parameters are just a consequence! 😉
hi sir iwant interior night light setting would you help me
thanks for your tutorials its very useful for us.
Hi Nadeem,
our plan includes many situations possible in renderviz. We just need time to produce high quality educational material. Thank you for your support!
In the scene of “ the light balance in rendering” yo use three vray ligths in the ceiling and Two lights inside the living room . you dont use vray sun. In other side In the scene of “delicate room you use vray sun, one vray light, two spots.
The question is how i can decide , how many ligths i have to put ut in the scene, and besides, How can i decide if i have to put the light in the cieling or not. I always have a had trouble whit this. I hope the question dont be so long. Sometimes gime over exposure or dark ilumination.
Thanks in advance CIRO
Hi Juan, you’re telling a really important thing! This is part of this project even if it isn’t revealed yet 🙂 Different situations need different solutions, this is in the reality and in the render too. Anyway the situations are not infinite: I think there are 7-8 general situations. The project here is creating a general guide with the light layout for every situation. In this way when you need to start you work, first you recognize the situation, then apply the solution designed for that. In these month everything will be clear 😉 Thanks for your comment.
thanks CIRO
Hola Ciro excelente tutorial, esta muy completo y entendible. Pero tengo un problema cuando intento descargar los archivos para los ejercicios, que hago?
Hola Omar!
mira al final te digo: “Download this scene…and apply these concepts to create the same light balance”. Es muy importante que no copies los parametros, solo aplicas el mismo concepto, el mismo LAYOUT de luzes y veras que esto lo podras aplicar a todas las similares a esta 😉
Hi, Sir Ciro
first of all, thank you… i will learn fast i can a sure you…
but i have to change my 3ds max design 2009 to 3dmax 2010…im excited to learn.
tasismoh
Hi Ciro!
Your tutorials are amazing!
I downloaded the exercise files but the bed cover and the mattress is missing from the scene. i wonder if you can add them?
Thanks a lot!
sorry was my mistake, fixed it:) good luck!
Great! 🙂
Mr Ciro,
Can you show me have to save the rendered images? My .jpg always look blurry when I export my images. Is there a standard way to save .jpg images?
Hi Hung!
do you mean that your image is perfect into the vray frame buffer… and blurred after saving?
hi ciro, where i can find the vray test preset ? and i think so the gamma is the same tutorial uploaded in the last day ago, right ?
thank you for your response
Hi Gilberto,
you need to start from here: https://www.cg-blog.com/index.php/dashboard/v-ray-basics
Lesson 2 is fundamental to start 🙂
Hi Ciro,
Is there a way to use real life light setting in this scene? For example, in real life, the light we have are probably a ceiling light, so can I use a light from top to simulate real life light source?
Hi Boon,
the idea to exactly replicate the real life is PERFECT: This should be the main goal. This example in fact is a replication of real life: “real life light settings for catalogues”. This is the layout a real photographer use to take a real shot for a real catalogue. If you want another situation just replicate the REAL situation. Don’t think in vray… vray is the last action: before figure out in your mind the real lighting and just use V-Ray to implement it. Thank you for your smart question!
Hi Ciro,
1) Can you make a screen whis a test render settings for this scene?
2) Downloading scene have a final rendering Vray settings?
3) Can you show me how modelling the box whis toy dragons? 🙂
__________
P/s. I’m from Russia, my english level not so perfectly. 🙂
Hi Alexanrd! thank you for your questions!
1) there’s a video with all process 2) yes 3) I’m afraid I can’t because these lessons are only for lighting and rendering.
Hello Ciro,
I am a newbie here.
First of all thanks a lot for your awesome tutorials. Your beginners tutorials gave me a
lot of confidence.
In this light balance tutorial, I have a concern.In the 3 BASIC RULES mentioned by you, the 3rd rule states that “Put the lights where the lights are in the real world”.
I am not able to correlate this rule with this lighting setup where two spot lights were used. I understand that the two spot lights are artificial lights( they are there for illuminating the furniture). In that case how do we know when to use such lights.
Thank you
Hi Phaneender,
especially for catalougues this is the regular configuration photographers use: the point is that in a real world we actually need artificial spots to take this shot. We are simulating a mix lighting: 50% natural + 50% artificial exactly how in the real world happens in these situations.
Thank you Ciro…Actually I thought that mine was a foolish question…But you gave me a patient and really good answer.
Ciro! I love this tutorial. After many years of trying to figure out a method for lighting and rendering you made me excited again to give it another shot. Everything makes sense and I can’t wait to try these theories on my own. Thank-you!
Hi Roc, I’m so happy about your feelings!
In fact my purpose is creating a strong “mindset”: everything have to follow a logic. My logic is photography, the simplest thing I could do: apply photographic concepts into renders. Of course sometimes there are difficulties… but if you have a logic you can think with your own brain: and this is a superior level! Happy studying!!!! 🙂
Hi Ciro ,
Very Strange way to light a space , i never think of adding lights without a real source light inside the room ,,,
what a bout the sky portals way , you know adding vray plan at the window opening & flag skyportals ,,, why you did’t use that > >
thanks …
Hi Mohammed,
I understand it could be strange for you that probably don’t know yet how to work with real lights in the real stages. As specified the purpose of this specific training is to show how real photographers light this kind of interior for catalogue. This technique is REAL, used in the real world and just applied in vray (nothing fake or tweaked by vray-nerds). If you want to learn how “portals” works please study LESSON#28.
I use vray settings like file 3d model but final picture discolored .. why??I need colorcorrect not?
Hi Dung,
did you tried with the final file?
Hola Ciro: Muy interesante la forma de iluminar una escena, siempre quise aprender a hacerlo y saber por que se hace de esa manera, muy explicito y puntual.
Muchas gracias!!