In these lesson I’ll talk about Final Render and Post Production.

INDEX
- What is ExtraTex channel
- How to use it for Ambien Occlusion pass
- Improve irradiance map and light cache
- What is “noise threshold” for final renders
- Composite AO with photoshop
- Add flares effects
- 13 mins narrated video showing all the process
- Final Blue Villa scene to download  / 120mb
Time to complete this lesson: 15 – 20 mins
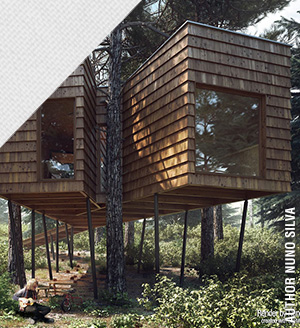
This is the final image every student could produce after completing this lesson:
[private Premium|Premium-1year|bluevilla|5trainings]
Until now we worked in “test mode”, that means a fast way to check lighintg and materials:
- Irradiance map = Low
- Light Cache = 500
- Noise Threshold = 0,01 (default value)
- Antialiasing = Adaptive Subdivisions
Before to run the final render – with all right V-Ray Settings – I want to introduce a way to add details. It is called ambient acclusion (AO) and we’re creating a new “layer” just for this one.
Watch the video:
CONCEPTS
- Just Add VRayDirt in ExtraTex channel to get Ambient occlusion pass
- Use “radius” to extract  small or big details from the scene
- Use “noise threshold” as main control to get high or low quality renders
- Don’t use noise threshold lower than 0,003
- 0,005 already produce an important increase of the render times
- Save all channels by clicking “save all image channels”
Final Render settings
These are the parameters I modify for the final render:
- Irradiance map = High
Best  distribution of global illumination - Light Cache = 2000 / enable “Raytrace”
Enhance  distribution of global illumination in the details - Noise Threshold = 0,005
Reduce grainess for all elements in the scene (vraylights, cameras, materials…)
Pay attention with this parameter: too low values could produce terrific render time increase! - Antialiasing = Adaptive DMC (min-max / 1-30)
Produce more details, especially in the textures
Some parameter could be different from the FINAL-Present you studied at Lesson 2.
Actually every scene is different, it’s up to you find the best combination to low the render time.
HEY [wlm_firstname]!
These parameters won’t affect “aesthetic impact”. The scene must be “beautiful” also with low settings.
Your scene won’t be beutiful just incresing values for final render! This is crucial to understand.
This is the final render after the V-Ray calculation:
Note: With i7 processor this render took around  3h to be completed.
Post Production
Many people don’t know how to correctly manage the Ambient occlusion layers.
The best way is using masks. Watch this video:
CONCEPTS:
- To center, drag and drop images into others by holding SHIFT key
- Use Multiply blending mode for ambient occlusion passes
- Reduce the effect using opacity 20-30%
- Use masks to remove AO in useless areas
- AO in the wall corners usually produce fake results
>Â Dowload PSD showing AO compositing
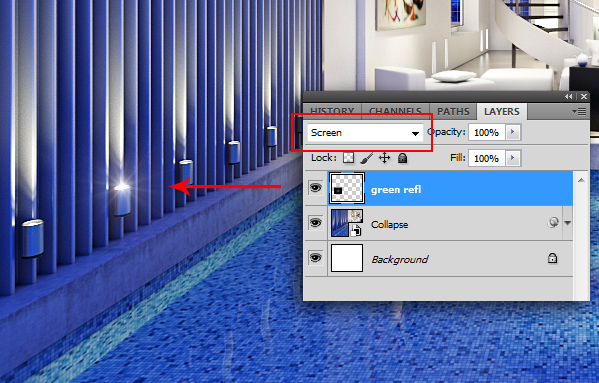
Tip: Adding Lens Flares
There are many ways to add lens flare effect, I already wrote about it in this lesson:Â V-Ray Lens Effect.
At this time I want to suggest another way: personally I prefer to keep separated layers if I can. It’s better to keep the full control on your final result.
Here the trick:
- Add “lens effect ” layers in screen mode
- Download here a “Lens Flares Pack” Â >Â download Lens Flares
- For my post production I used “green refl”
Note: There’s also a  fantastic photoshop plugins to do that: Knoll Factory. Check it 😉
Now your have all information you need to easily achieve this result.
Just do it and be proud of yourself! 😉
 Â Exercise
 Exercise
Download the Max file with all materials and complete
Finale Render (step4) and Post Production (step 5).
FILES:
- Blue Villa: max file (for starting step 4 and 5)
- All textures
TASKS:
– Create new channels for Ambien occlusion (with VRayExtraTex)
– Change V-Ray settings for final render
– Composite AO in Photoshop
– Add Lens Flares in Photoshop
SOLUTION:
To verify your exercise and/or for any doubt, please download:
[/private]
 / Also Learn Corona Renderer


Hello sir,
This is simply amazing, and undoubtedly u are the best vray tutor in this world.
good job Ciro Sannino tanks
Great Method… if you need a assistent i’m here…
I saw VRay Dirt AO Details and Areas in matl slots… how you use that… do you put in Override or waht ?
Hi Sandro,
everything is clearly explained in the video.
did you checked it?
hello ciro,
combining two versions of AO is simply brilliant.
Thanks for your useful tips.
Thank you Ciro,
the AO and the post production process help me really a lot. Thanks for everything
Wow the whole villa trainning is amazing! I can´´t wait to apply it all to my own scene 😀 thank you so much for your help
Hi Ciro
I have a question for methods of creating AO pass.
What is the difference between the method you describe with Vrayedgetex for AO, or using Material overrride with vray dirt in vray global settings. (other than the posibility to get a seperate channel).?
Hi Martin,
I answered you with a video 😉
https://vimeo.com/49835604
Thanks Ciro. You are amazing. That was very thorough described. 🙂
But the only thing that irritates me, is that you haft to do two renders before you can do your post in Photoshop.
My first render is with channels: RGB Color, reflectionm refraction, global illu, z-depth. etc.
It is not possible to make an AO channel (vrayedgetex) with the same render, because you haft to make a seperate render where you turn off the glass in your windows.
My second render (AO): Is with two channels with vrayedgetex. And glass turned off.
Is there not a solution for this problem, so you only haft to render one time. It is not funny when you have a render which takes 8 hours to render.
Is it possible to render a vrayedgetex (AO pass) without rendering the RGB color. To speed up render two.???
Hi Martin,
I prepared for you and for all the users interested in,
a brief explaination of HOW TO GET A QUICK AO (follow the link 😉
Ciro you are amazing….again….. Just what I needed. 🙂
And so effective in your workflow.
Hey Ciro!
Great tutorials mate!
A qick question : what irriadians settings would you use for a picture size 4000×2500 pixel? in (max and min rate) To get a good result.
Hi Espen! Thanks for your comment! About your question is impossible to say: it depends of the details you have in your scene. Anyway take a look here > https://www.cg-blog.com/index.php/knowledge-base/reduce-time-render
hi. thats good training. I like it deeply. Thanks